Buffing and Polishing: Enhancing Your Car's Shine
Discover the benefits of applying a clear coat to your classic car's paint job. Learn how to choose the right clear coat and apply it properly. Enhance the gloss and durability of your finish.

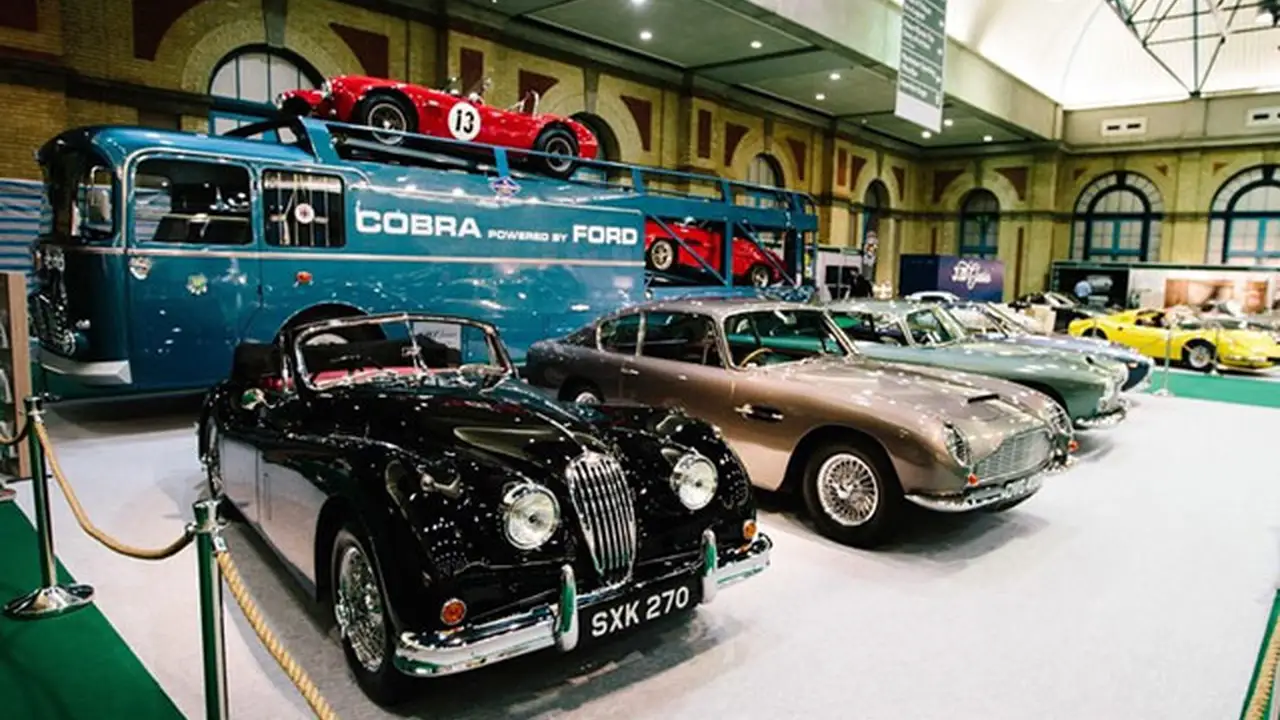
So, you've spent countless hours getting that classic car bodywork perfect. The paint is flawless, the color is popping, and you're almost ready to cruise. But hold on! Don't skip the clear coat. It's the unsung hero of a great paint job, protecting your hard work and giving your car that showroom shine.
What is Clear Coat and Why Do You Need It?
Clear coat is essentially a transparent layer of paint that goes over the base coat (the colored paint). It's like the protective armor for your paint job, shielding it from all sorts of nasty things like UV rays, scratches, bird droppings, and even those pesky swirl marks from washing. Without a clear coat, your base coat is vulnerable and will fade, scratch, and generally look sad much faster. Think of it as sunscreen for your car!
Types of Clear Coats Understanding Your Options
There are several types of clear coats available, each with its own pros and cons. Let's break down the most common ones:
Single-Stage Clear Coats
These are exactly what they sound like – a single product that combines the color and clear coat into one. They're easier to apply and often cheaper, but they don't offer the same level of protection or gloss as a two-stage system. They're best for budget builds or cars that don't need a super high-end finish.
Two-Stage Clear Coats The Industry Standard
This is the most common type of clear coat. It involves applying a base coat for color and then a separate clear coat layer. Two-stage clear coats offer superior protection, durability, and gloss compared to single-stage systems. They’re the go-to for most restoration projects.
Urethane Clear Coats Durability and Gloss
Urethane clear coats are known for their excellent durability and resistance to chemicals and UV rays. They provide a hard, glossy finish that's perfect for classic cars. They are generally easier to apply than lacquer-based clear coats.
Acrylic Lacquer Clear Coats Classic Car Authenticity
Acrylic lacquer clear coats were commonly used on classic cars back in the day, so they're a good choice if you're aiming for historical accuracy. They offer a beautiful, high-gloss finish, but they're not as durable as urethane clear coats and can be more prone to cracking and fading. They also require more coats and are more sensitive to environmental conditions during application.
Ceramic Clear Coats The Ultimate Protection
Ceramic clear coats are the newest kids on the block, and they offer the ultimate in protection and durability. They're incredibly scratch-resistant, chemical-resistant, and UV-resistant. They also provide a super glossy, hydrophobic finish that makes your car easier to clean. However, they are more expensive and require professional application.
Choosing the Right Clear Coat for Your Classic Car Project
So, which clear coat should you choose? Here's a quick guide:
- Budget Build: Single-stage or a budget-friendly urethane clear coat.
- Show-Quality Finish: High-quality urethane or ceramic clear coat.
- Historical Accuracy: Acrylic lacquer clear coat.
- Daily Driver: Durable urethane or ceramic clear coat.
Recommended Clear Coat Products and Pricing
Here are a few specific clear coat products that are popular among classic car restorers:
Eastwood 2K AeroSpray Clear Coat
Type: Urethane Aerosol
Usage: Perfect for smaller projects, touch-ups, or if you don't have spray equipment. Delivers a durable, glossy finish.
Pros: Easy to use, good gloss, decent durability.
Cons: Not as durable as professional-grade clear coats, aerosol can be less consistent than a spray gun.
Price: Around $30 per can.
PPG Deltron DC4000
Type: Urethane
Usage: A professional-grade clear coat known for its excellent gloss, durability, and ease of application. Requires a spray gun and proper safety equipment.
Pros: High gloss, excellent durability, easy to apply for professionals.
Cons: Requires a spray gun and proper safety gear, more expensive than aerosol options.
Price: Around $250 per gallon (plus activator).
SPI Universal Clear
Type: Urethane
Usage: Another popular professional-grade clear coat that offers a great balance of gloss, durability, and price. Known for its user-friendly application.
Pros: Great gloss, good durability, relatively affordable for a professional product.
Cons: Requires a spray gun and proper safety gear.
Price: Around $200 per gallon (plus activator).
Gyeon CanCoat
Type: Ceramic Coating (Sprayable)
Usage: A sprayable ceramic coating that provides excellent protection and hydrophobic properties. Easier to apply than traditional ceramic coatings, but still offers impressive results.
Pros: Excellent protection, hydrophobic, easy to apply for a ceramic coating.
Cons: More expensive than urethane clear coats, requires careful preparation.
Price: Around $80 per can.
Application Techniques Achieving a Professional Finish
Applying clear coat properly is crucial for achieving a flawless finish. Here's a step-by-step guide:
- Preparation is Key: Make sure your base coat is completely dry and free of any imperfections. Lightly sand the base coat with fine-grit sandpaper (e.g., 600-grit or higher) to create a smooth surface for the clear coat to adhere to. Clean the surface thoroughly with a tack cloth to remove any dust or debris.
- Mixing the Clear Coat: Follow the manufacturer's instructions carefully when mixing the clear coat with the activator. Use the correct ratio to ensure proper curing and durability.
- Spray Gun Setup: If you're using a spray gun, adjust the settings according to the manufacturer's recommendations. Test the spray pattern on a piece of cardboard to ensure it's even and consistent.
- Applying the First Coat: Apply a light, even coat of clear coat, overlapping each pass by about 50%. This is called a "tack coat." Let it dry for the recommended time (usually 15-30 minutes).
- Applying the Second Coat: Apply a second, heavier coat of clear coat, again overlapping each pass. This coat will provide the gloss and protection.
- Optional Third Coat: For even more gloss and protection, you can apply a third coat of clear coat. Let each coat dry completely before applying the next.
- Drying and Curing: Allow the clear coat to dry and cure completely according to the manufacturer's instructions. This can take several days or even weeks, depending on the type of clear coat and environmental conditions.
- Color Sanding (Optional): If you want to achieve a truly flawless finish, you can color sand the clear coat with fine-grit sandpaper (e.g., 2000-grit or higher) after it has cured. This will remove any imperfections and create a perfectly smooth surface for polishing.
- Buffing and Polishing: After color sanding, buff and polish the clear coat to restore the gloss and shine. Use a high-quality buffing compound and polish, and follow the manufacturer's instructions carefully.
Clear Coat Application Tools and Equipment
Having the right tools makes all the difference. Here's a rundown of essential equipment:
- Spray Gun: A high-quality spray gun is essential for achieving a professional finish. Look for a gun with adjustable settings and a good spray pattern.
- Air Compressor: You'll need an air compressor to power your spray gun. Make sure it's large enough to provide a consistent air supply.
- Air Filter/Dryer: An air filter/dryer is crucial for removing moisture and contaminants from the air supply. This will prevent imperfections in the clear coat.
- Mixing Cups and Sticks: Use mixing cups and sticks to accurately measure and mix the clear coat with the activator.
- Tack Cloths: Tack cloths are used to remove dust and debris from the surface before applying the clear coat.
- Sandpaper: You'll need a variety of sandpaper grits for preparing the surface and color sanding the clear coat.
- Buffing Pads and Polishes: Use buffing pads and polishes to restore the gloss and shine after color sanding.
- Safety Equipment: Always wear a respirator, gloves, and eye protection when working with clear coat.
Common Clear Coat Problems and Solutions Troubleshooting Tips
Even with the best techniques, problems can arise. Here are some common issues and how to fix them:
- Orange Peel: This is a textured finish that looks like the skin of an orange. It's usually caused by improper spray gun settings, incorrect mixing ratios, or applying the clear coat too thickly. To fix it, color sand the clear coat and buff it to a smooth finish.
- Runs and Sags: These are caused by applying the clear coat too thickly or spraying too slowly. To fix them, let the clear coat dry completely and then sand down the runs and sags. Reapply the clear coat in thin, even coats.
- Fish Eyes: These are small, circular imperfections that are caused by contaminants on the surface. To prevent fish eyes, make sure the surface is clean and free of any oil, grease, or silicone. If you get fish eyes, you may need to strip the clear coat and start over.
- Blushing: This is a milky or hazy appearance that is caused by moisture in the air. It's more common in humid conditions. To prevent blushing, use a dehumidifier in your spray booth or add a retarder to the clear coat.
Maintaining Your Clear Coat Preserving the Shine
Once you've applied the clear coat, it's important to maintain it properly to preserve the shine and protect your paint job. Here are a few tips:
- Wash Your Car Regularly: Wash your car regularly with a mild soap and water. Avoid using harsh detergents or abrasive cleaners.
- Wax Your Car: Wax your car every few months to protect the clear coat from the elements and enhance the shine.
- Avoid Direct Sunlight: Park your car in the shade whenever possible to protect the clear coat from UV rays.
- Remove Bird Droppings and Bugs Immediately: Bird droppings and bugs can damage the clear coat if left on for too long. Remove them immediately with a soft cloth and a mild cleaner.
Applying a clear coat is a crucial step in restoring your classic car's paint job. By choosing the right clear coat, using proper application techniques, and maintaining it properly, you can achieve a durable, glossy finish that will protect your car for years to come.
:max_bytes(150000):strip_icc()/277019-baked-pork-chops-with-cream-of-mushroom-soup-DDMFS-beauty-4x3-BG-7505-5762b731cf30447d9cbbbbbf387beafa.jpg)


