Rust Repair: A Step-by-Step Guide for Beginners
Learn the fundamentals of rust repair on classic cars Follow a step-by-step guide to remove rust patch holes and prevent future corrosion Restore the structural integrity of your vehicle
Understanding Rust Formation on Classic Cars
Okay, let's talk rust. It's the bane of any classic car owner's existence, but it's a fact of life. Understanding how rust forms is the first step to fighting it. Rust, or iron oxide, occurs when iron or steel is exposed to oxygen and moisture. This electrochemical process weakens the metal, leading to structural damage and, of course, that unsightly appearance. Classic cars, due to their age and often less-than-ideal storage conditions, are especially susceptible.
There are a few key factors that accelerate rust formation:
- Moisture: Rain, snow, humidity – anything that keeps the metal wet.
- Salt: Road salt is a HUGE culprit. If you live in a snowy region, your car is at constant risk.
- Temperature: Warmer temperatures generally speed up the rusting process.
- Contaminants: Dirt, grime, and other pollutants trap moisture and accelerate corrosion.
Knowing these factors helps you anticipate where rust is likely to form and take preventative measures.
Identifying Rust Damage on Your Classic Vehicle
Before you can fix rust, you need to find it! Rust can manifest in several ways, from minor surface rust to severe, penetrating corrosion. Here’s what to look for:
- Surface Rust: This is the most common type and appears as a reddish-brown discoloration on the metal surface. It’s usually just on the surface and can be removed relatively easily.
- Scale Rust: This is more advanced than surface rust. The rust forms in layers or scales that flake off the metal. This indicates that the rust has penetrated deeper.
- Penetrating Rust: This is the worst kind. It eats its way through the metal, creating holes and weakening the structure. This requires more extensive repairs.
- Hidden Rust: This can be tricky to find. Check areas that are prone to trapping moisture, such as:
- Wheel wells
- Rocker panels
- Floor pans
- Around window and door seals
- Inside body panels (use a borescope if possible)
Don't be afraid to get your hands dirty and really inspect your car. Use a screwdriver or ice pick to gently probe suspicious areas. If the metal is soft or crumbles easily, you've got rust.
Essential Tools and Materials for Classic Car Rust Repair
Now for the fun part: getting your hands dirty! Here’s a list of the tools and materials you’ll need for basic rust repair:
- Safety Gear:
- Safety glasses
- Respirator or dust mask
- Gloves (nitrile or rubber)
- Ear protection
- Rust Removal Tools:
- Wire brush (various sizes and shapes)
- Angle grinder with:
- Wire wheel
- Grinding disc
- Flap disc
- Sandpaper (various grits, from coarse to fine)
- Sandblaster (optional, but highly recommended for heavy rust)
- Pick hammer and dolly (for shaping metal)
- Welding Equipment (for patching holes):
- MIG welder (easiest for beginners)
- Welding helmet
- Welding gloves
- Welding pliers
- Sheet metal (same gauge as your car's body)
- Bodywork Supplies:
- Body filler (Bondo)
- Body filler spreader
- Primer
- Paint (matched to your car's original color)
- Clear coat
- Masking tape
- Masking paper or plastic
- Tack cloth
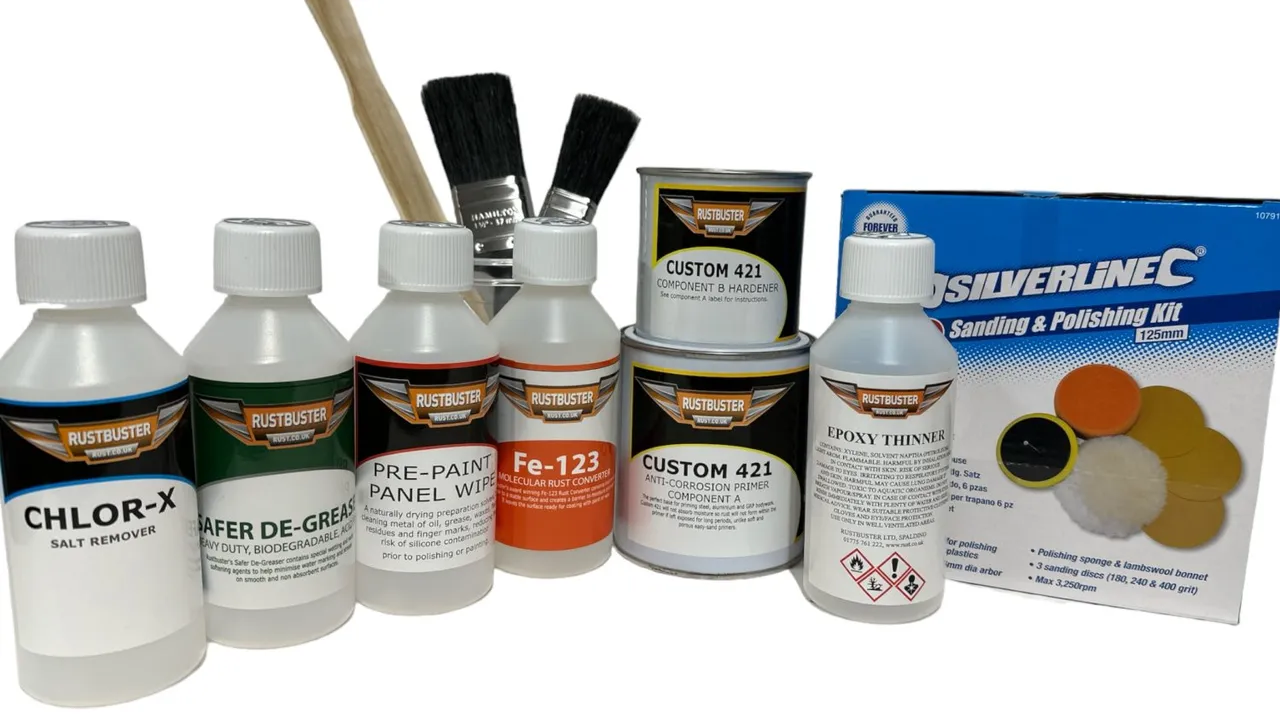
- Rust Converter/Inhibitor:
- POR-15
- Eastwood Rust Converter
- 3M Rust Fighter
- Cleaning Supplies:
- Degreaser
- Wax and grease remover
- Clean rags
Step-by-Step Guide to Removing Surface Rust from Your Vintage Vehicle
Let's start with the easiest type of rust to tackle: surface rust. Here’s a step-by-step guide:
- Prepare the Area: Clean the area thoroughly with degreaser and wax and grease remover. This removes any dirt, oil, or contaminants that could interfere with the rust removal process.
- Remove the Rust:
- Wire Brush: For small areas of surface rust, a wire brush is often sufficient. Scrub vigorously to remove the rust.
- Angle Grinder: For larger areas, an angle grinder with a wire wheel or flap disc is more efficient. Use light pressure and move the grinder constantly to avoid overheating the metal.
- Sandpaper: Start with a coarse grit sandpaper (e.g., 80-grit) to remove the bulk of the rust. Then, gradually move to finer grits (e.g., 120-grit, 220-grit) to smooth the surface.
- Clean Again: Wipe down the area with wax and grease remover to remove any remaining dust and debris.
- Apply Rust Converter/Inhibitor: Apply a rust converter or inhibitor according to the manufacturer's instructions. This will neutralize any remaining rust and prevent it from spreading. POR-15 is a popular choice, but Eastwood Rust Converter and 3M Rust Fighter are also excellent options.
- Prime and Paint: Once the rust converter/inhibitor is dry, prime the area with a high-quality automotive primer. Then, paint the area with a paint that matches your car's original color. Apply several thin coats for the best results.
- Clear Coat (Optional): Apply a clear coat to protect the paint and add a glossy finish.
Repairing Rust Holes The Patch Panel Method
When rust has eaten its way through the metal, you'll need to patch the holes. This requires welding skills and a bit more effort, but it's definitely achievable for a determined DIYer.
- Cut Out the Rusted Metal: Use an angle grinder with a cutting disc to cut out all the rusted metal around the hole. Be sure to cut back to solid, unrusted metal.
- Create a Patch Panel: Cut a piece of sheet metal that is slightly larger than the hole. Use a hammer and dolly to shape the patch panel to match the contour of the surrounding metal. This is crucial for a seamless repair.
- Weld the Patch Panel in Place: Position the patch panel over the hole and weld it in place using a MIG welder. Use short, controlled welds to avoid overheating the metal and causing warping.
- Grind Down the Welds: Use an angle grinder with a grinding disc to grind down the welds until they are flush with the surrounding metal.
- Apply Body Filler: Apply a thin layer of body filler (Bondo) to fill any imperfections and smooth the surface.
- Sand the Body Filler: Sand the body filler with progressively finer grits of sandpaper until the surface is smooth and even.
- Prime and Paint: Prime the area with a high-quality automotive primer. Then, paint the area with a paint that matches your car's original color. Apply several thin coats for the best results.
- Clear Coat (Optional): Apply a clear coat to protect the paint and add a glossy finish.
Product Recommendations for Rust Repair and Prevention
Here are a few specific product recommendations, along with their uses, comparisons, and approximate prices:
Rust Converters:
- POR-15 Rust Preventive Coating:
- Use: A highly effective rust preventive coating that chemically bonds to rusted surfaces, forming a rock-hard, non-porous barrier that prevents rust from returning. It's ideal for heavily rusted areas.
- Comparison: POR-15 is known for its exceptional durability and resistance to solvents and chemicals. It's more expensive than some other rust converters, but it's worth the investment for long-lasting protection.
- Price: Approximately $40-$50 per quart.
- User Scenario: Perfect for coating the undercarriage of your classic car after removing loose rust.
- Eastwood Rust Converter:
- Use: A user-friendly rust converter that neutralizes rust and converts it into a paintable primer. It's a good option for less severe rust.
- Comparison: Eastwood Rust Converter is easier to apply than POR-15 and doesn't require as much surface preparation. It's also more affordable. However, it may not be as durable as POR-15 in harsh environments.
- Price: Approximately $20-$30 per quart.
- User Scenario: Ideal for treating surface rust on body panels before painting.
- 3M Rust Fighter:
- Use: A spray-on rust inhibitor that penetrates into hard-to-reach areas, providing long-term protection against rust and corrosion. It's ideal for protecting inner body panels and cavities.
- Comparison: 3M Rust Fighter is easy to apply and provides excellent protection in enclosed areas. However, it's not as effective on exposed surfaces as POR-15 or Eastwood Rust Converter.
- Price: Approximately $15-$25 per can.
- User Scenario: Great for spraying inside rocker panels and door panels to prevent rust from forming.
Body Fillers:
- Bondo Body Filler:
- Use: A classic body filler for repairing dents, dings, and rust holes. It's easy to sand and shape.
- Comparison: Bondo is a widely available and affordable body filler. However, it can be prone to shrinking and cracking over time if not applied properly.
- Price: Approximately $15-$25 per quart.
- User Scenario: Filling minor imperfections after welding in a patch panel.
- Evercoat Rage Gold Premium Body Filler:
- Use: A high-quality body filler that is more resistant to shrinking and cracking than Bondo. It's also easier to sand and shape.
- Comparison: Evercoat Rage Gold is more expensive than Bondo, but it's worth the investment for a more durable and professional-looking repair.
- Price: Approximately $30-$40 per quart.
- User Scenario: Filling larger dents and imperfections for a smoother, more durable finish.
Primers:
- SEM Self-Etching Primer:
- Use: A primer that etches into the metal surface, providing excellent adhesion for paint. It's ideal for bare metal surfaces.
- Comparison: SEM Self-Etching Primer provides superior adhesion compared to standard primers. It's also resistant to rust and corrosion.
- Price: Approximately $20-$30 per can.
- User Scenario: Priming bare metal after removing rust or welding in a patch panel.
- Dupli-Color Primer Sealer:
- Use: A primer that seals the surface and provides a smooth base for paint. It's a good option for previously painted surfaces.
- Comparison: Dupli-Color Primer Sealer is easy to apply and provides good coverage. It's also more affordable than self-etching primers.
- Price: Approximately $10-$15 per can.
- User Scenario: Priming a surface that has already been painted and sanded.
Preventative Measures to Stop Rust from Returning
The best way to deal with rust is to prevent it from forming in the first place. Here are a few preventative measures you can take:
- Wash and Wax Regularly: Regular washing removes dirt, salt, and other contaminants that can accelerate rust formation. Waxing provides a protective barrier against moisture and UV rays.
- Apply Undercoating: Undercoating provides a thick, protective layer on the undercarriage of your car, shielding it from road salt and other debris.
- Store Your Car Indoors: Storing your car indoors protects it from the elements and reduces the risk of rust formation.
- Address Paint Chips and Scratches Promptly: Paint chips and scratches expose the bare metal to the elements, making it susceptible to rust. Repair these imperfections as soon as possible.
- Use Rust Inhibitor Sprays: Spray rust inhibitor into hard-to-reach areas, such as rocker panels and door panels, to prevent rust from forming.
- Consider a Ceramic Coating: Ceramic coatings offer excellent protection against environmental contaminants and UV rays, helping to prevent rust and maintain your car's finish.
Important Safety Considerations
Rust repair involves working with power tools, chemicals, and potentially hazardous materials. It’s crucial to prioritize safety. Always wear safety glasses, a respirator, gloves, and ear protection when working on your car. Work in a well-ventilated area to avoid inhaling fumes. Follow the manufacturer's instructions for all products and tools. When welding, use a welding helmet and gloves to protect yourself from sparks and radiation.
Final Thoughts
Rust repair can seem daunting, but with the right tools, materials, and knowledge, it's a very doable project. Don't be afraid to tackle it yourself! With a little patience and effort, you can restore your classic car to its former glory and keep it looking great for years to come.
:max_bytes(150000):strip_icc()/277019-baked-pork-chops-with-cream-of-mushroom-soup-DDMFS-beauty-4x3-BG-7505-5762b731cf30447d9cbbbbbf387beafa.jpg)