Electrical System Restoration: Wiring Harness Repair
Ensure reliable starts for your classic car by restoring its ignition system. Learn about points, condensers, and distributors. Improve engine performance and reliability.
Understanding Classic Car Electrical Systems and Wiring Harness Basics
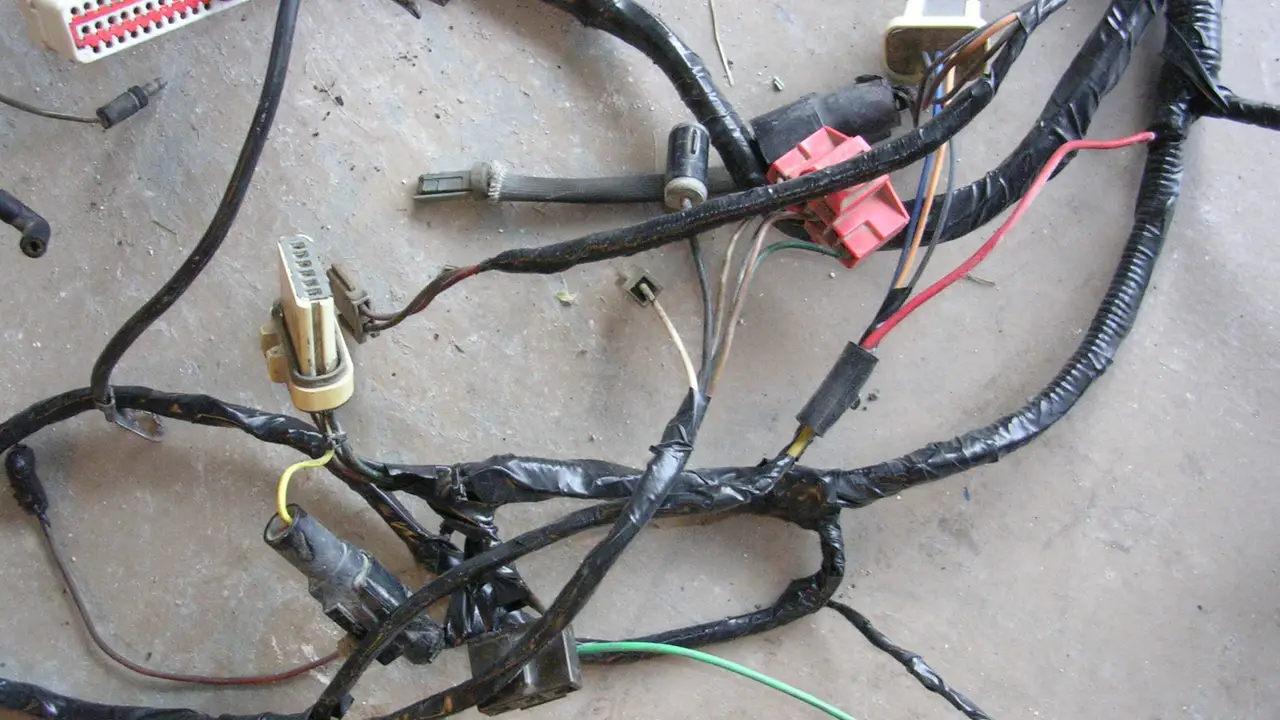
Okay, let's dive into the often-overlooked world of classic car electrical systems. Think of your wiring harness as the nervous system of your car – it connects everything and allows it to function. Over time, these harnesses can become brittle, corroded, or just plain worn out. This can lead to all sorts of electrical gremlins, from flickering lights to complete system failures. Restoring it isn't just about getting your car running; it's about safety and reliability.
A typical classic car wiring harness consists of numerous wires, each color-coded for specific circuits. These wires are bundled together and protected by a fabric or plastic sheathing. Connectors, terminals, and fuses are strategically placed throughout the harness to facilitate connections and protect the system from overloads. Understanding these components is crucial before you start any restoration work.
Diagnosing Electrical Issues in Your Vintage Vehicle
Before you even think about tearing into your wiring, you need to pinpoint the problem. A systematic approach is key. Start by checking the basics: battery connections, fuses, and grounds. A multimeter is your best friend here. Use it to check for voltage drops, continuity, and shorts. Trace the wiring diagrams (if you can find them!) to understand the circuit you're troubleshooting. Common issues include:
- Corrosion: Look for green or white buildup on terminals and connectors.
- Brittle Wiring: Old wires can crack and break, leading to shorts or open circuits.
- Loose Connections: Vibration can loosen connections over time.
- Damaged Insulation: Rodents and heat can damage the insulation, causing shorts.
Don't just guess! Take your time, be methodical, and you'll eventually find the culprit.
Essential Tools and Materials for Electrical Wiring Restoration
Having the right tools makes all the difference. Here's a list of essentials:
- Multimeter: For testing voltage, current, and resistance. A must-have!
- Wire Strippers: Get a good quality set that won't damage the wires.
- Crimpers: For securely attaching terminals and connectors.
- Soldering Iron and Solder: For making permanent connections.
- Heat Shrink Tubing: To insulate and protect soldered connections.
- Electrical Tape: For wrapping and insulating wires (use sparingly!).
- Wiring Diagram: Absolutely essential for tracing circuits.
- Replacement Wire: Get the correct gauge and color-coding.
- Connectors and Terminals: Assorted sizes and types.
- Fuse Puller: To safely remove fuses.
- Diagonal Cutters: For trimming wires and components.
Don't skimp on quality! Good tools will last longer and make the job easier.
Step-by-Step Guide to Wiring Harness Repair and Replacement in Classic Cars
Alright, let's get to the actual repair. Here's a general outline:
- Disconnect the Battery: Safety first! Always disconnect the battery before working on the electrical system.
- Inspect the Harness: Carefully examine the entire harness for damage, corrosion, and brittle wiring.
- Identify the Problem Area: Use your multimeter and wiring diagram to pinpoint the exact location of the fault.
- Remove the Old Wiring: Carefully cut out the damaged section of wire, leaving enough length to make a connection.
- Prepare the New Wiring: Cut the new wire to the correct length and strip the insulation.
- Make the Connection: Use a crimper or soldering iron to attach the new wire to the existing wiring.
- Insulate the Connection: Cover the connection with heat shrink tubing or electrical tape.
- Test the Circuit: Use your multimeter to verify that the circuit is working properly.
- Repeat as Needed: Continue repairing or replacing sections of the harness until all the problems are resolved.
- Reassemble the Harness: Wrap the repaired section of the harness with electrical tape or sheathing.
- Reconnect the Battery: Carefully reconnect the battery and test all the electrical components.
Remember to take pictures before you start disconnecting anything! This will help you remember how everything goes back together.
Upgrading Your Classic Car's Electrical System: Modernization Options
While restoring your original wiring is great, sometimes it makes sense to upgrade certain components. Here are a few options:
- Electronic Ignition Conversion: Replacing the points and condenser with an electronic ignition system can improve reliability and performance.
- Alternator Conversion: Upgrading from a generator to an alternator provides more power and better charging.
- LED Lighting: LED lights are brighter, more efficient, and last longer than traditional incandescent bulbs.
- Modern Fuses: Replacing old glass fuses with modern blade fuses improves safety and reliability.
Consider these upgrades carefully, balancing performance with originality.
Product Recommendations: Wiring Harnesses, Tools, and Components
Replacement Wiring Harnesses
When the original wiring harness is beyond repair, consider a replacement. Several companies specialize in manufacturing wiring harnesses for classic cars. Here are a few:
- Painless Wiring: Known for their high-quality harnesses and comprehensive kits. They offer universal harnesses and direct-fit replacements for many classic car models. Expect to pay around $500-$1500 depending on the complexity.
- American Autowire: Another reputable manufacturer offering a wide range of harnesses and electrical components. Their harnesses are known for their accuracy and ease of installation. Prices are similar to Painless Wiring.
- YnZ's Yesterday's Parts: Specializes in original-style wiring harnesses for classic cars. If you're aiming for 100% originality, this is a good option. Prices can be higher due to the complexity of recreating original harnesses.
Essential Electrical Tools
Having the right tools is crucial for any electrical work. Here are some recommendations:
- Fluke 115 Multimeter: A reliable and accurate multimeter for diagnosing electrical problems. It's user-friendly and offers a wide range of functions. Price: ~$150
- Klein Tools Wire Stripper/Cutter: A high-quality wire stripper that can handle a variety of wire gauges without damaging the wires. Price: ~$30
- IWISS Wire Crimper Tool: A versatile crimping tool for various types of terminals and connectors. It provides a secure and reliable crimp. Price: ~$40
- Weller WLC100 Soldering Station: A reliable soldering station for making permanent connections. It features adjustable temperature control and a comfortable handle. Price: ~$50
Connectors and Terminals
When replacing connectors and terminals, it's important to choose high-quality components that will provide a secure and reliable connection. Here are a few options:
- Delphi Weather Pack Connectors: Weather-resistant connectors that are ideal for use in harsh environments. They provide a secure and watertight connection. Price: ~$20 per set
- Molex Connectors: Versatile connectors that are available in a variety of sizes and configurations. They are easy to use and provide a reliable connection. Price: ~$10 per set
- Assorted Ring Terminals and Spade Connectors: Essential for making connections to ground points and electrical components. Choose high-quality terminals that are made from copper and feature a corrosion-resistant finish. Price: ~$10-$20 for an assortment pack
Safety Precautions for Working with Classic Car Electrical Systems
Electricity can be dangerous, so always take precautions:
- Disconnect the Battery: Always disconnect the battery before working on the electrical system.
- Wear Safety Glasses: Protect your eyes from sparks and debris.
- Use Insulated Tools: Prevent shocks by using tools with insulated handles.
- Work in a Well-Ventilated Area: Avoid breathing in fumes from soldering or cleaning chemicals.
- Don't Work Alone: Have someone nearby in case of an emergency.
If you're not comfortable working with electricity, it's best to consult a professional.
Troubleshooting Common Electrical Problems in Vintage Automobiles
Even with careful restoration, electrical problems can still arise. Here's a quick guide to troubleshooting common issues:
- Flickering Lights: Check the wiring connections, ground points, and headlight switch.
- Engine Won't Start: Check the battery, starter, ignition system, and fuel system.
- Blown Fuses: Identify the cause of the overload before replacing the fuse.
- Dead Battery: Check the charging system, battery condition, and parasitic draws.
A systematic approach and a good understanding of your car's electrical system are essential for successful troubleshooting.
Preserving Originality vs Modernization in Automotive Electrical Work
One big question is how original to keep things. Purists will want to maintain the original wiring and components as much as possible, even if it means more frequent repairs. Others prefer to modernize for improved reliability and performance. There's no right or wrong answer; it depends on your goals and preferences.
If you're aiming for originality, try to source original-style wiring and components. If you're modernizing, consider upgrades like electronic ignition, LED lighting, and a more powerful alternator. Just be sure to document any changes you make for future reference.
Long-Term Maintenance for Your Classic Car's Wiring
Once you've restored your wiring harness, proper maintenance is key to keeping it in good condition. Regularly inspect the wiring for damage, corrosion, and loose connections. Keep the battery terminals clean and tight. Protect the wiring from heat and moisture. By following these simple tips, you can ensure that your classic car's electrical system will provide years of reliable service.
:max_bytes(150000):strip_icc()/277019-baked-pork-chops-with-cream-of-mushroom-soup-DDMFS-beauty-4x3-BG-7505-5762b731cf30447d9cbbbbbf387beafa.jpg)


