Painting Techniques: Achieving a Show-Quality Finish
Discover professional painting techniques to achieve a show-quality finish on your classic car Learn about spray gun settings, application methods, and color sanding Impress everyone with your restoration
Introduction to Classic Car Painting Techniques
So, you're ready to take your classic car's paint job to the next level? Awesome! Achieving a show-quality finish isn't just about slapping on some paint; it's an art form. It's about understanding the tools, the materials, and, most importantly, the techniques. This isn't a quick process, but trust me, the results are worth the effort. We'll dive into everything from setting up your spray gun to mastering color sanding. Get ready to impress everyone at the next car show!
Preparing Your Workspace for Painting Classic Cars
First things first, your workspace is crucial. You can't just paint anywhere. You need a clean, well-ventilated area. Ideally, a proper paint booth is the best option, but let's be real, not everyone has one of those. A garage can work, but you need to ensure it's as dust-free as possible. Dust is your enemy when it comes to a flawless paint job. Lay down plastic sheeting on the walls and floor to catch overspray and keep dust from kicking up. Good lighting is also essential. You need to see what you're doing. Invest in some good quality work lights. Remember, preparation is key!
Essential Tools and Equipment for Classic Car Painting
Now, let's talk tools. You'll need a high-quality spray gun. There are two main types: HVLP (High Volume Low Pressure) and LVLP (Low Volume Low Pressure). HVLP guns are great for beginners because they're more forgiving and reduce overspray. LVLP guns are more efficient and can provide a smoother finish, but they require more skill. You'll also need an air compressor, air hoses, respirators, mixing cups, stir sticks, tack cloths, and sandpaper in various grits (from 220 to 3000). Don't skimp on quality here; good tools make a huge difference. A paint suit is a must to protect yourself from the chemicals. Safety first!
Understanding Spray Gun Settings for Classic Car Paint Application
The spray gun is your magic wand, but it needs to be set up correctly. There are three main adjustments: fluid control, fan control, and air pressure. The fluid control knob adjusts the amount of paint that comes out of the gun. The fan control knob adjusts the width of the spray pattern. The air pressure regulator controls the air pressure going to the gun. Start with the manufacturer's recommended settings for your paint. Then, practice on a piece of cardboard to fine-tune the settings. You want a consistent, even spray pattern without runs or orange peel. Experimentation is key!
Choosing the Right Paint for Your Classic Car Restoration
Selecting the right paint is critical. There are several types of automotive paint: lacquer, enamel, acrylic urethane, and single-stage. Lacquer is a classic choice, providing a deep, glossy finish. However, it's less durable and requires more coats. Enamel is more durable but doesn't have the same depth of gloss. Acrylic urethane is a modern option that combines durability and gloss. Single-stage paint combines the color and clear coat into one. Consider the original paint type of your car and your desired level of authenticity. Research different brands and read reviews. PPG, DuPont, and House of Kolor are popular choices. Don't forget the primer! Use a high-quality primer compatible with your paint. It helps with adhesion and provides a uniform base for the color coat.
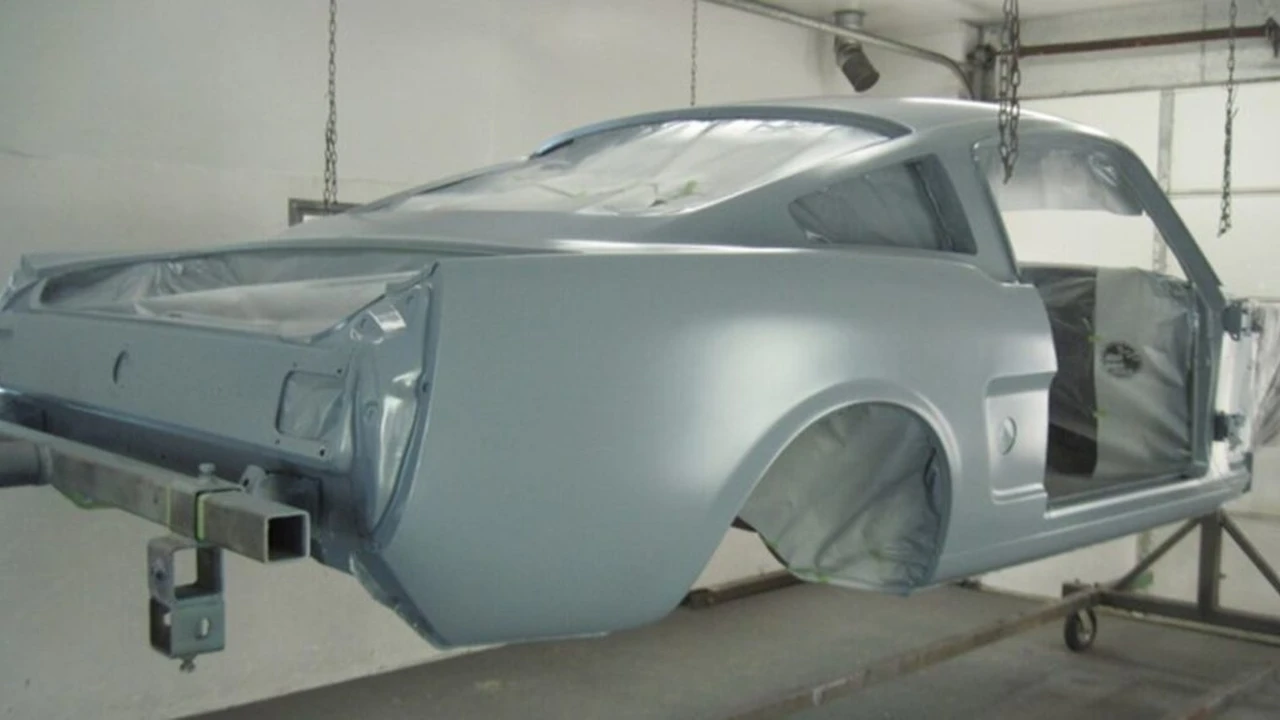
Mastering Painting Techniques Applying the Base Coat on Your Classic Car
Applying the base coat is where the magic happens. Start by applying a thin, even coat of primer. Let it dry completely and then sand it smooth with fine-grit sandpaper (400-grit). Next, apply two to three coats of base coat, allowing each coat to dry according to the manufacturer's instructions. Overlap each pass by about 50% to ensure even coverage. Keep the spray gun moving at a consistent speed and distance from the surface. Avoid spraying too much paint in one area, which can cause runs. Patience is a virtue here. Take your time and focus on achieving a smooth, even finish. Remember to use a tack cloth between coats to remove any dust particles.
Applying the Clear Coat Protection for Your Classic Car Paint
The clear coat is what gives your paint that deep, glossy shine and protects it from the elements. Apply two to three coats of clear coat, allowing each coat to dry according to the manufacturer's instructions. Use the same overlapping technique as with the base coat. Pay close attention to the temperature and humidity, as these can affect the drying time and finish. Some painters add a flex agent to the clear coat, especially if the car will be driven frequently. This helps prevent cracking. After the clear coat is fully cured, it's time for the final step: color sanding and polishing.
Color Sanding The Key to a Flawless Classic Car Finish
Color sanding is the process of removing imperfections in the clear coat, such as orange peel and dust nibs. It involves using progressively finer grits of sandpaper to level the surface. Start with 2000-grit sandpaper and work your way up to 3000-grit. Use a sanding block to ensure a flat, even surface. Keep the sandpaper wet to prevent clogging and scratching. Be careful not to sand through the clear coat! After color sanding, the surface will look dull and hazy. That's where polishing comes in.
Polishing and Buffing Techniques for Classic Car Paint
Polishing is the process of restoring the shine to the color-sanded surface. Use a polishing compound and a buffing pad on a rotary buffer. Start with a coarse polishing compound and then switch to a finer compound. Keep the buffer moving at a consistent speed and pressure. Be careful not to overheat the paint, which can cause it to burn. After polishing, use a wax or sealant to protect the paint and enhance the shine. Congratulations, you've achieved a show-quality finish!
Recommended Products for Classic Car Painting Projects
Alright, let’s talk specifics! Here are a few product recommendations based on different budgets and scenarios:
- Spray Gun:
- Budget-Friendly: TCP Global Professional Grade HVLP Spray Gun Set - Great for beginners. Around $150.
- Mid-Range: DeVilbiss Finishline 4 FLG-670 - A solid all-around performer. Around $300.
- High-End: SATAjet 5000 B - The gold standard for professionals. Expect to pay around $700-$1000.
- Paint:
- Single Stage: Eastwood Single Stage Urethane - Easy to apply and durable. Around $150 per gallon.
- Base Coat/Clear Coat: PPG Deltron - Excellent color match and gloss. Price varies greatly by color, but expect around $300-$500 per gallon for the base coat and clear coat combined.
- Polishing Compound:
- Meguiar's Ultimate Compound: A great all-around compound for removing scratches and swirl marks. Around $15.
- 3M Perfect-It EX Rubbing Compound: A more aggressive compound for heavier imperfections. Around $30.
Troubleshooting Common Painting Issues on Classic Cars
Painting isn't always smooth sailing. Here are some common issues and how to fix them:
- Orange Peel: Caused by improper spray gun settings or paint that's too thick. Adjust the spray gun settings and thin the paint if necessary.
- Runs: Caused by applying too much paint in one area. Sand down the run and repaint the area.
- Dust Nibs: Caused by dust particles in the air. Use a tack cloth between coats and ensure your workspace is clean.
- Fish Eyes: Caused by contaminants on the surface. Clean the surface thoroughly before painting.
Safety Precautions When Painting Classic Cars
Painting can be dangerous if you're not careful. Always wear a respirator to protect yourself from the fumes. Wear gloves and a paint suit to protect your skin and clothing. Work in a well-ventilated area. Avoid smoking or eating while painting. Dispose of paint and solvents properly. Read and follow the manufacturer's instructions for all products. Safety is paramount!
:max_bytes(150000):strip_icc()/277019-baked-pork-chops-with-cream-of-mushroom-soup-DDMFS-beauty-4x3-BG-7505-5762b731cf30447d9cbbbbbf387beafa.jpg)